
Users
Users lists the people who can use the dashboard and the print service. Click a user to load their details on the right, then use the row of tabs below the detail panel to manage everything attached to them.
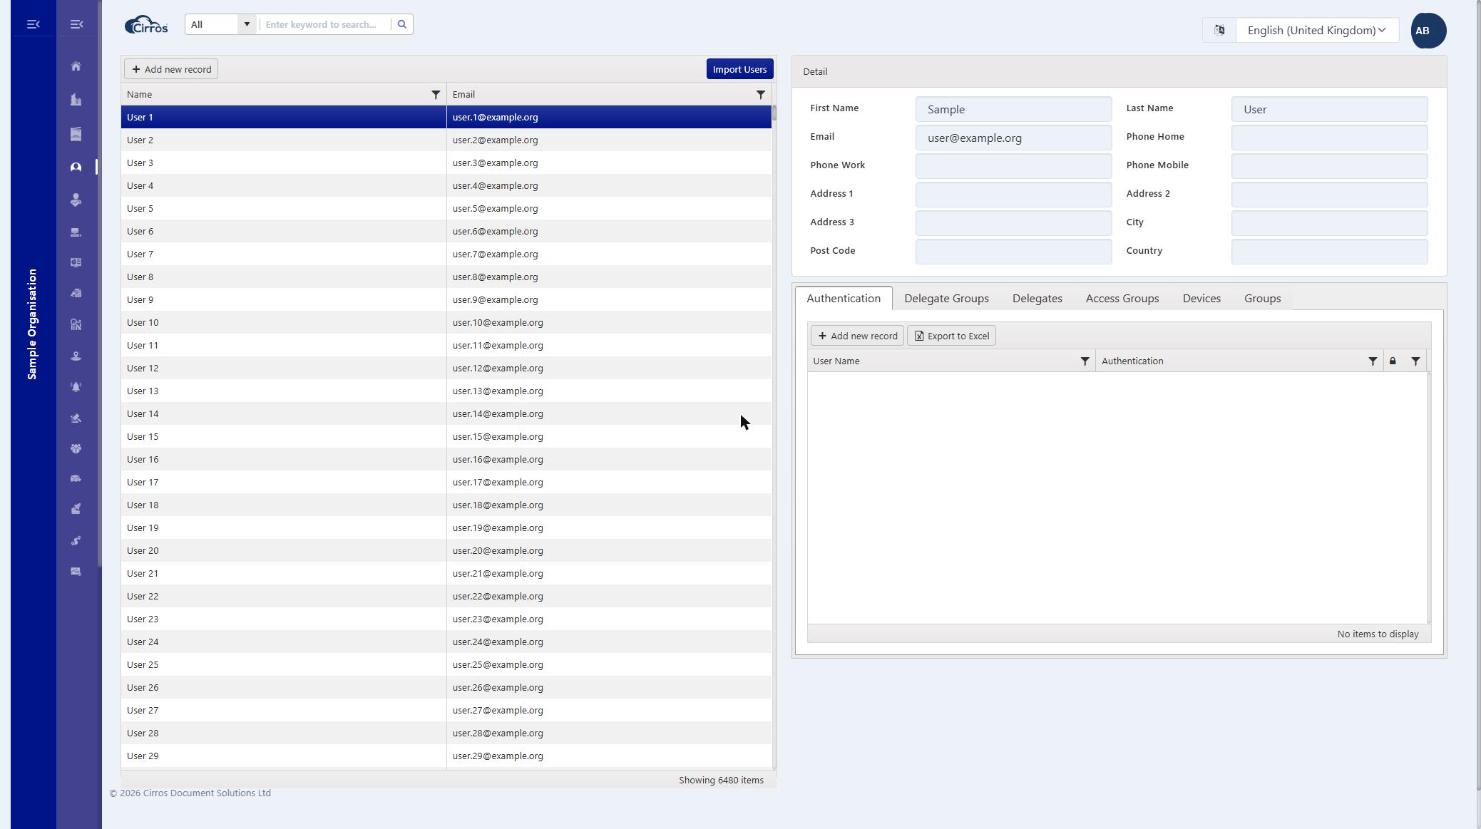
The user’s detail tabs
With a user selected, the tabs beneath the detail panel each manage one aspect of that user:
- Authentication — the cards and sign-in methods registered to the user. Each row shows the credential and its type (for example Card / Mifare, Azure AD, Manual Input / PIN, Mobile, BLE or Google Smart Tap) and whether it is locked. Use Add new record to register a method, or Create/Reset PIN to issue a PIN. Right-click a card in this panel for Edit item, Remove item (to delete the card) and Unlock — deleting a card is done here, on the Authentication panel, not from the user list.
- Delegate Groups — the delegate groups the user belongs to. Members of a delegate group can release and manage each other’s print jobs.
- Delegates — the individual people allowed to release and manage this user’s held print jobs on their behalf.
- Access Groups — the user’s roles (what they can see and do). Add or remove roles here; see Roles & permissions for what each grants.
- Devices — the devices linked to this user.
- Groups — the groups the user is a member of, used to organise users and for group-based reporting.
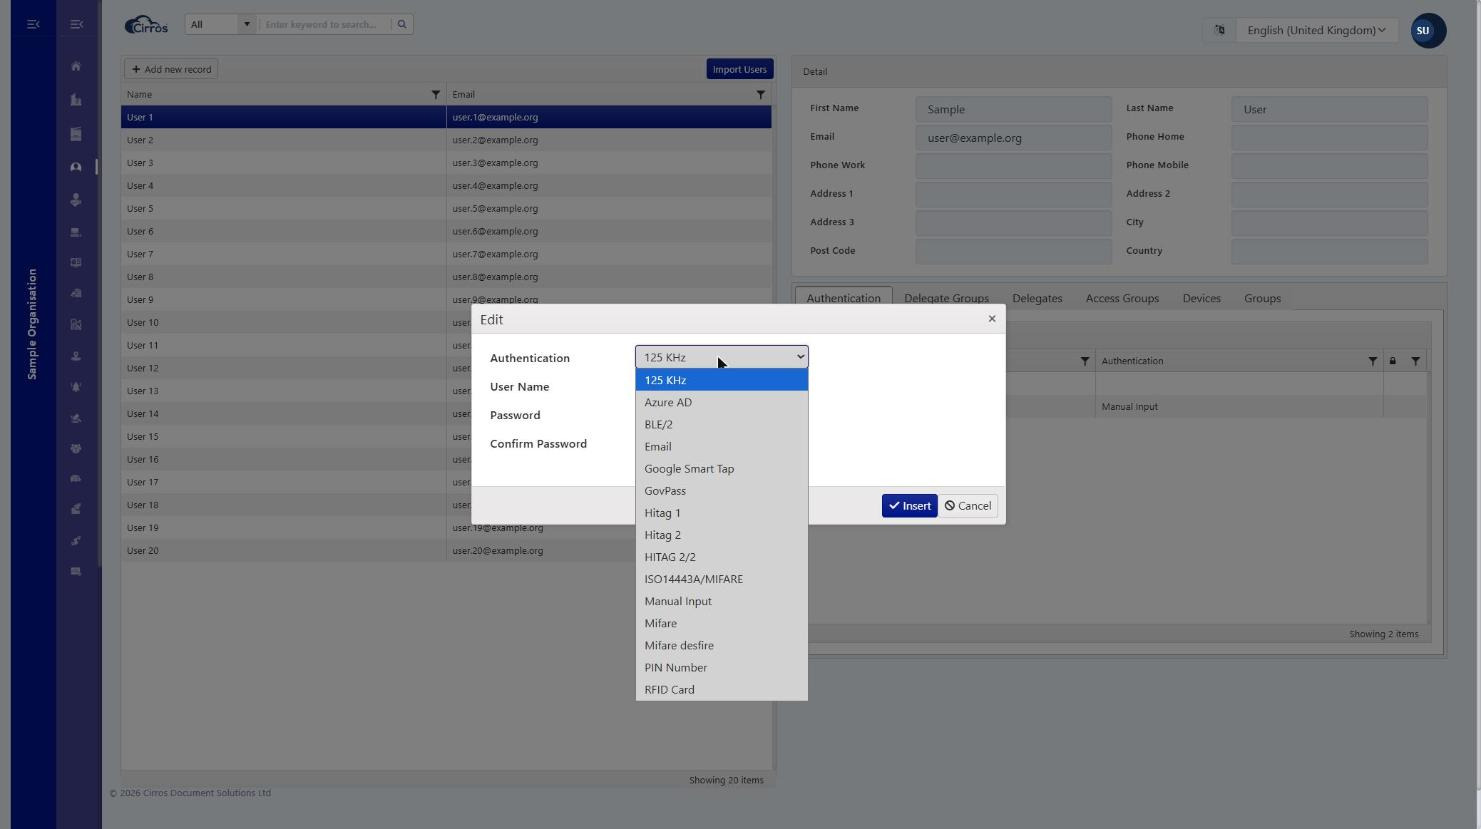
When you add an authentication method (Add new record on the Authentication tab), you pick its type from the full list of supported methods — cards, mobile, email and PINs: 125 KHz, Azure AD, BLE/2, Email, Google Smart Tap, GovPass, Hitag 1, Hitag 2, HITAG 2/2, ISO14443A/MIFARE, Manual Input, Mifare, Mifare desfire, PIN Number and RFID Card. Choose PIN Number to give the user a numeric PIN for releasing prints at a device.
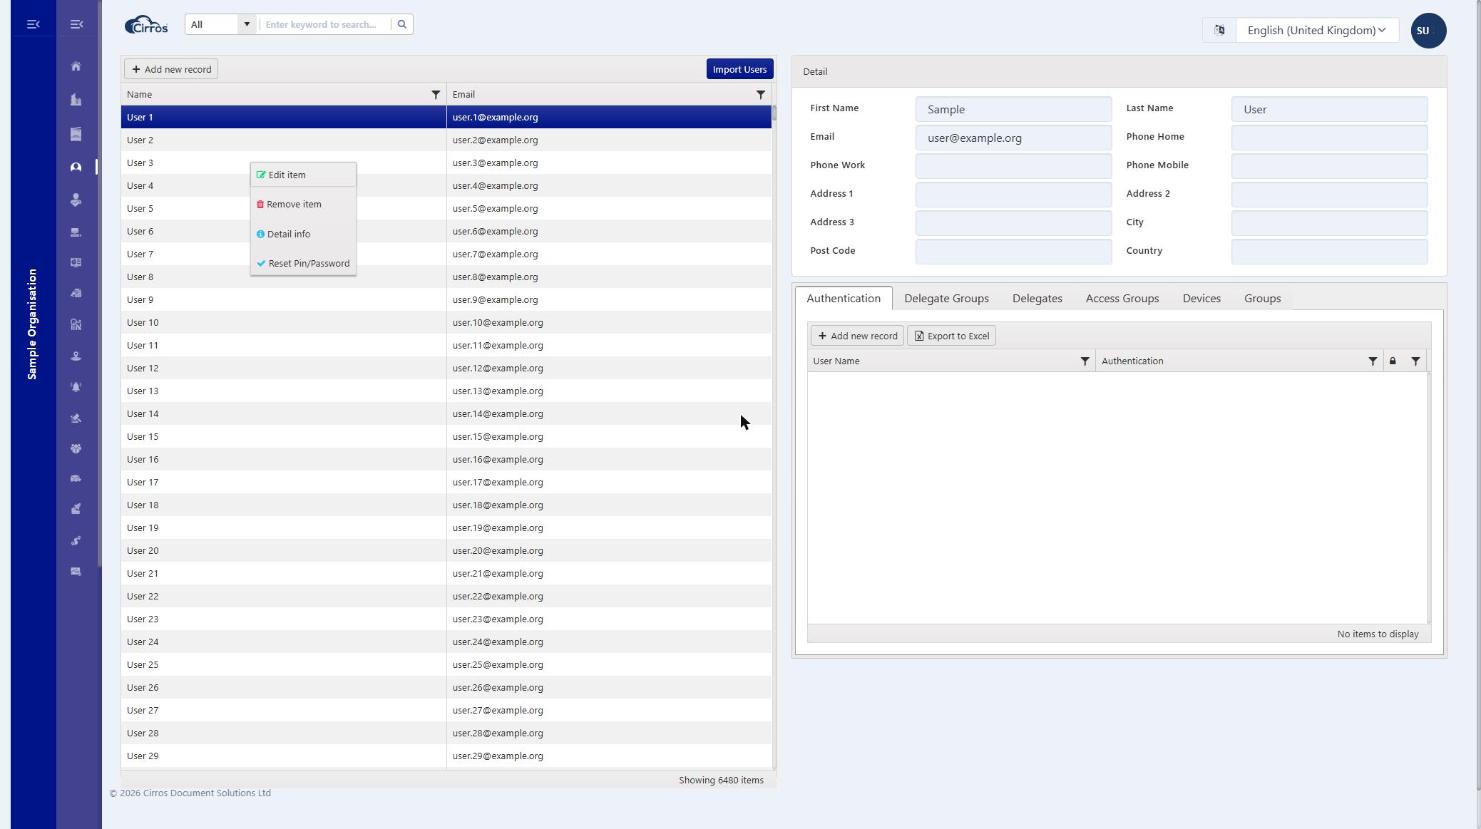
Right-click a user
Right-click a user row for quick actions (the options you see depend on your permissions):
- Edit — open the user to change their details. You can also double-click the row. (Requires Edit User.)
- Remove item — delete the user. (Requires Remove User.)
- Detail info — view the user’s recent print, copy and scan transactions. (Requires View User Info.)
- Reset PIN — issue the user a new PIN. (Shown when manual PIN entry is enabled and you have the Reset User PIN permission.)
To change a user’s roles, open the user and use the Access Groups tab. See Roles & permissions for what each role allows.
Note. Use Import Users (top of the list) to add users in bulk. Managing users requires the appropriate role, such as Company Admin.