
Guest and public printing
How to print, copy and scan as a guest or public user at a Cirros printer, and how to pay at the payment terminal.
Your screen may look different. The screenshots on this page vary depending on the device you are using.
Print a document
Printing is a two-step process. First you send the document to the printer, then you release the print job at the printer.
Send a document to the printer
- Open the print menu. In any application, select Print (usually File › Print).
- Choose Cirros. Select Send to Cirros as the printer, then select Print.
- Set your print job. The Cirros print ticket appears. Choose your print job specification: colour, plex mode, paper type, number of copies and so on.
- Send the job. Select Print to Cloud.
- Note your Job Code. A Cirros message shows your Job Code. Make a note of it: you enter it at the printer to release your job, and it cannot be retrieved later. Select OK, then go to the printer.
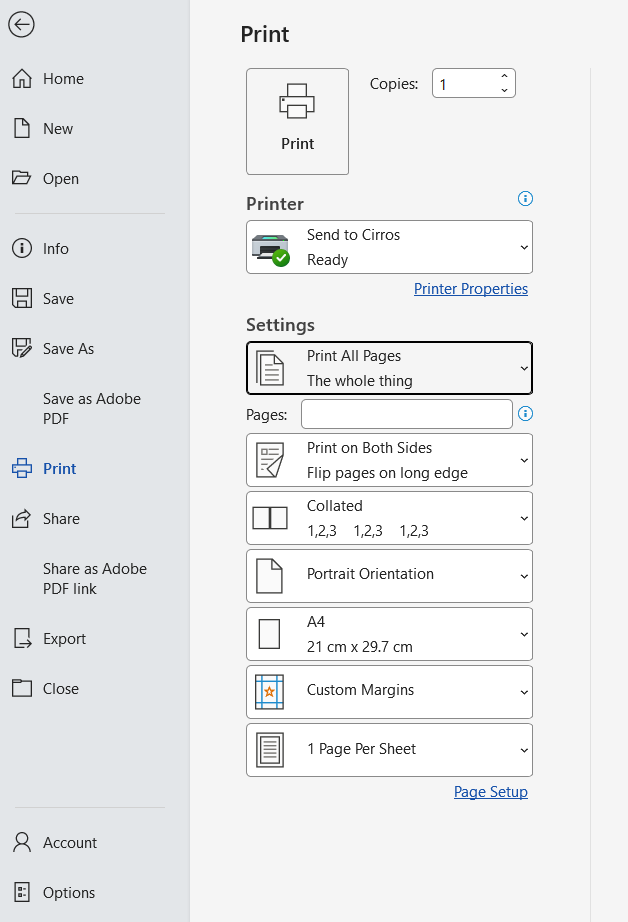
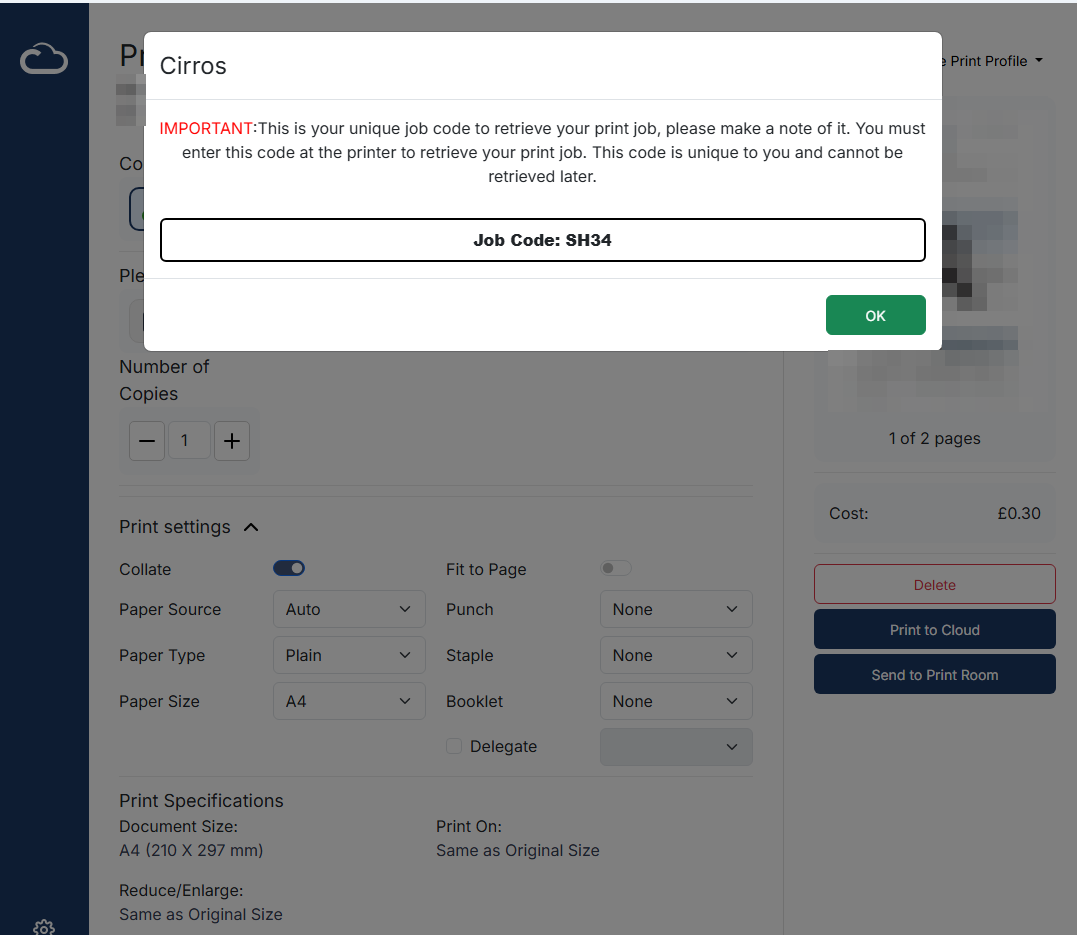
Where to set your options. You can choose the print job specification (colour, plex mode, paper type, number of copies and so on) from the application's own print menu or in the Cirros Print application.
Release the print job at the printer
- Choose Print. At the printer, select Print.
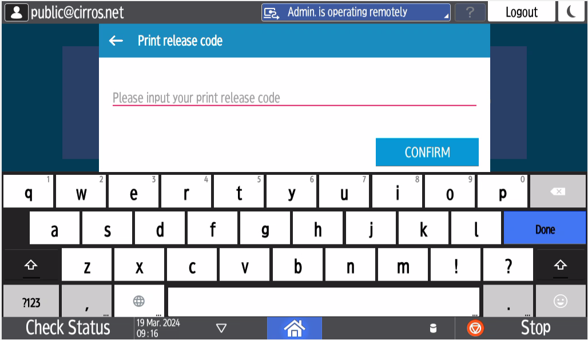
- Enter your code. Type your Print Release Code (your Job Code) and select Confirm.
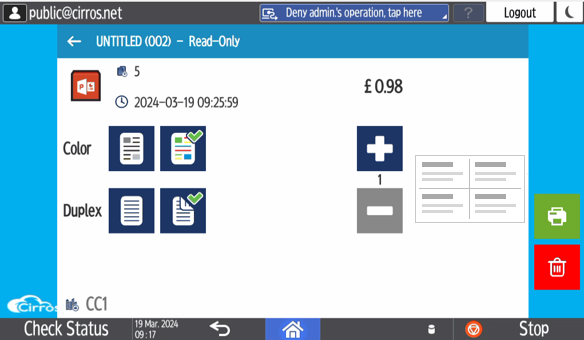
- Choose your settings. The print options screen appears. Select mono or colour, single-sided or duplex, and the number of copies, then select the green print icon.
- Add more jobs if you need to. The printer asks whether you want to print additional documents. If you do, follow the instructions on screen and repeat the steps above. Once you have added all your print jobs, continue to payment.
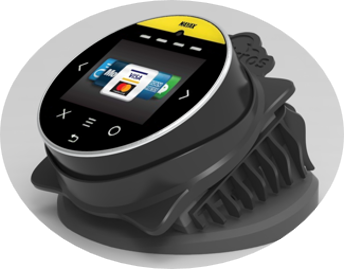
- Pay. The total cost appears on screen. Tap a contactless payment method at the payment terminal. See Pay at the terminal.
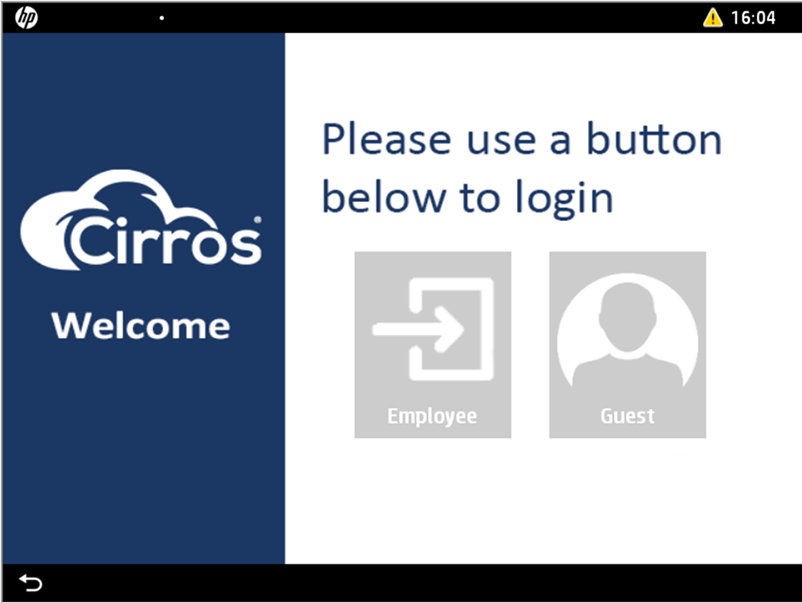
Guest button. On some devices you need to select Guest on the welcome screen to reach the Print, Copy and Scan options.
Copy a document
- Choose Copy. At the printer, select Copy. On some devices you need to select Guest first.
- Load your document. Place your document or documents in the document feeder or on the flatbed.
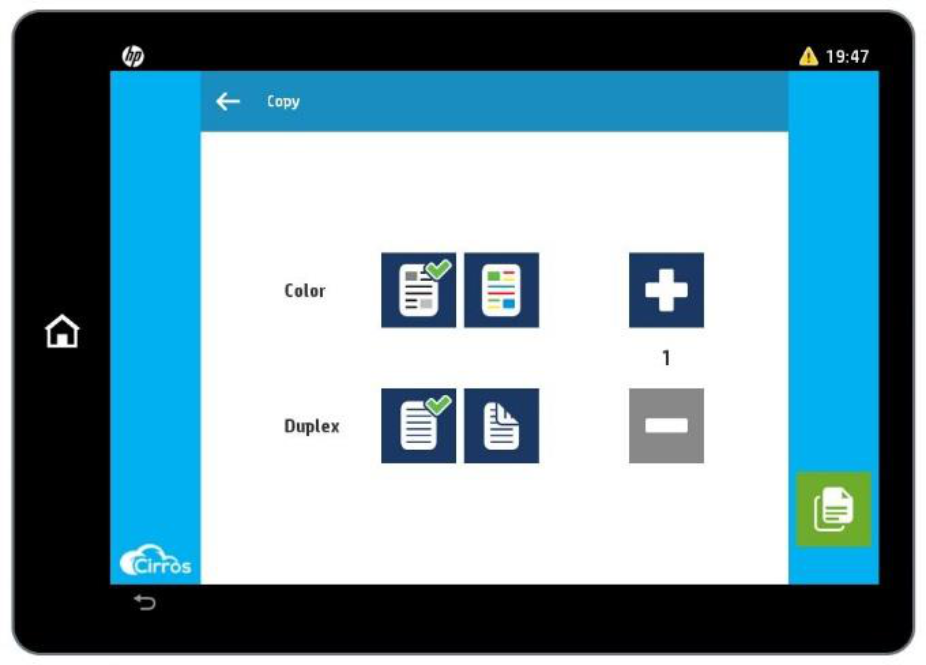
- Choose your settings. The copy options screen appears. Select mono or colour, single-sided or duplex, and the number of copies, then select the green copy icon.
- Pay. The total cost appears on screen. Tap a contactless payment method at the payment terminal.
Default copy settings. The defaults are mono (black), single-sided and one copy.
Scan a document
- Choose Scan. At the printer, select Scan. On some devices you need to select Guest first.
- Load your document. Place your document or documents in the document feeder or on the flatbed.
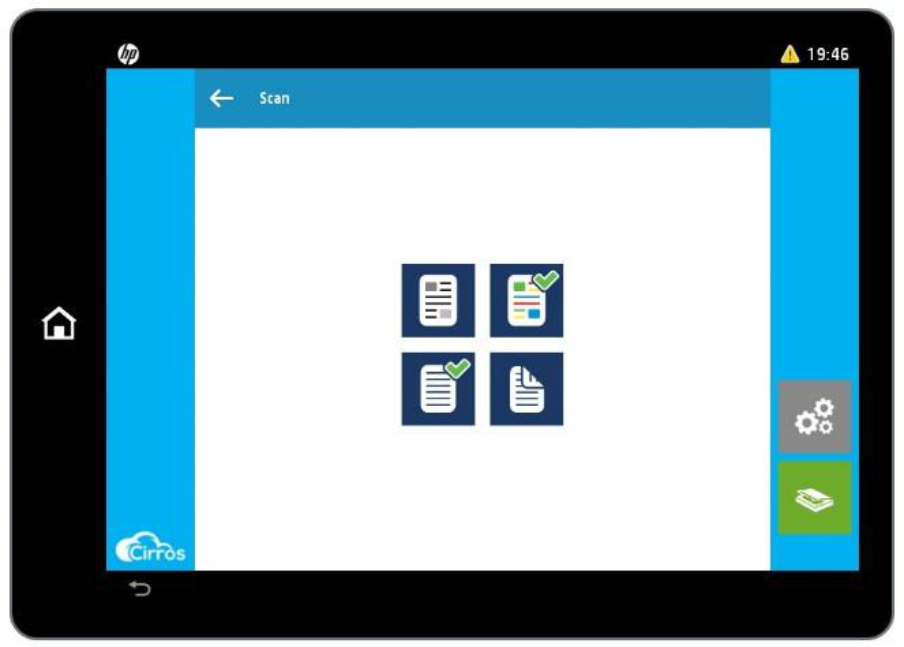
- Choose your settings. The scan options screen appears. Select mono or colour and single-sided or duplex, then select the green scan icon.
- Pay. The total cost appears on screen. Tap a contactless payment method at the payment terminal.
- Enter your email address. Type the email address you want the scanned document sent to.
Default scan settings. The defaults are mono (black) and single-sided. Select the grey settings icon to reach the advanced options.
Pay at the terminal
For every print, copy and scan, the total cost appears on screen before you pay. Tap a contactless payment method at the payment terminal to pay.
For the full sequence, including pre-authorisation and what happens if a job does not finish, see Paying for public printing.
What you can do at a public device
- Print a document you have sent to the device.
- Where the site allows it, copy and scan as well.
Printing, copying and scanning on a public device are chargeable. The cost is shown on screen before you pay.
Ways to send your document
As well as printing from your own computer with Send to Cirros, depending on the site you can:
- Upload it on the web upload page for that site. You are given a short Job Code, for example AB12. Make a note of it. See Uploading documents to print.
- Email it to the email print address the site gives you. See Printing by email.
- Print from a shared or library computer where Cirros is already set up, then collect the print at the device.
Keep your Job Code. Your Job Code is unique to you and is needed to collect your print, so keep it to hand until you have collected your document.
Find your job at the device
At the public print device, enter your Job Code when you are asked, or select your job from the list. Check the cost shown on screen before you pay.
If you do not collect your print
Nothing prints until you are at the device and have paid, so your document is not left in the tray for someone else to pick up. If you do not collect or pay for a job, it is held for a limited time and then removed automatically.
If something goes wrong
| If | Do this |
|---|---|
| Your job is not listed | Check you entered the Job Code correctly. If you have just sent the document, wait a few moments and try again. |
| The payment is declined | Try the card again, or use a different card. A decline is handled by the payment terminal, not by Cirros. |
| Nothing prints after payment | Wait a few moments, then ask a member of staff for help, quoting your Job Code. |
Your card details are safe. Card payment is handled entirely by the payment terminal. Cirros never sees or stores your card details.
Printing for third parties and contractors
People who do not have accounts in your organisation, such as a contractor delivering a service on your behalf, can still print at your Cirros devices. There are two ways to do it, and you can use both in different places. Your IT support can set up either one.
Route A: give them their own accounts
Use this when the third-party users are a known, fairly stable group who print regularly, and you want them to print the same way your own staff do.
- Sign in. They sign in with any of the standard methods: PIN only (4 to 8 digits), email and PIN, or card.
- Print and release. They print to the Cirros queue from their own device and release the job at the device, exactly as your own staff do. Staff and contractors share the same devices.
- Queue on their devices. Printing from the Cirros queue needs an identity to print under, so use this route if you want the queue added to their computers.
Route B: guest print by Job Code, no account needed
Use this when the third-party users are occasional, or the people keep changing. There are no accounts to manage and nothing to install.
- Upload. The user uploads a document on your web upload page and is given a short Job Code.
- Collect. At the device they enter the code. Either a signed-in member of your staff releases the job for them, as at a reception desk, or the user does it themselves if the device allows anonymous Guest access.
Ask your IT support whether self-service guest access is available. For the three ways to release a guest job, see Guest print and Scan to OneDrive.
Which route to choose
| If the third party is... | Use | Why |
|---|---|---|
| A known, regular group printing from their own devices | Route A (accounts) | They print and release just like staff, and you can add the print queue to their devices. |
| Occasional, or frequently different people | Route B (Job Code) | No accounts to manage, nothing to install, and they collect at the device with a code. |
To set up either route, tell your IT support which suits the site and roughly how many third-party users there are.