
Using Cirros on Xerox printers
How to sign in at a Xerox printer, then print, copy and scan with Cirros.
No login or keycard? See Guest and public printing.
Signing in
Sign in at the printer before you release a print, copy or scan.
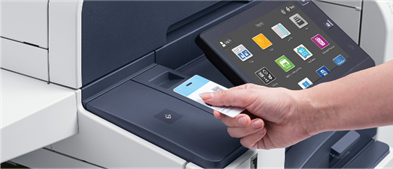
- Tap your keycard, or log in. Tap your keycard on the card reader, or select Login and sign in with your Username (your email address) and Password (your PIN).
Printing
Printing has two parts. You send the document from your computer, then release it at the printer.
First time using Send to Cirros
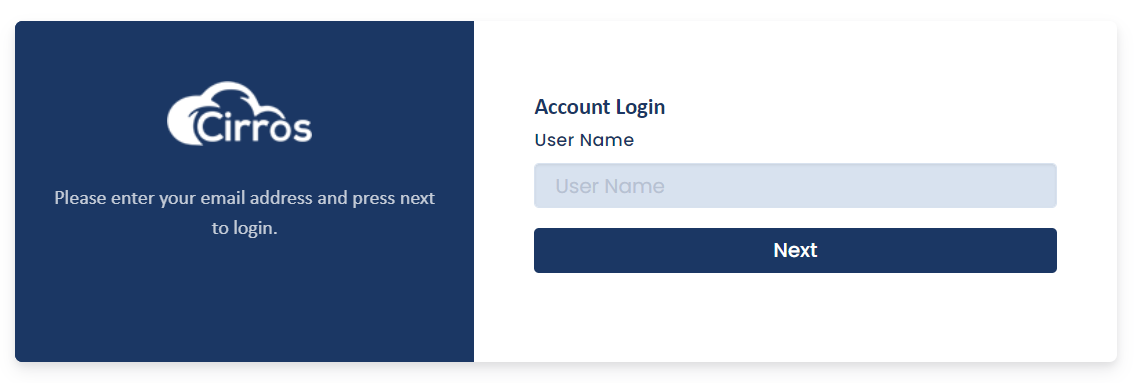
The first time you use the Send to Cirros option, you are asked to log in to your account.
- Enter your email address. Type it in the User Name field, then click Next.
- Enter your passcode. Type it in the Passcode field, then click Log in.
Sending a document from your computer
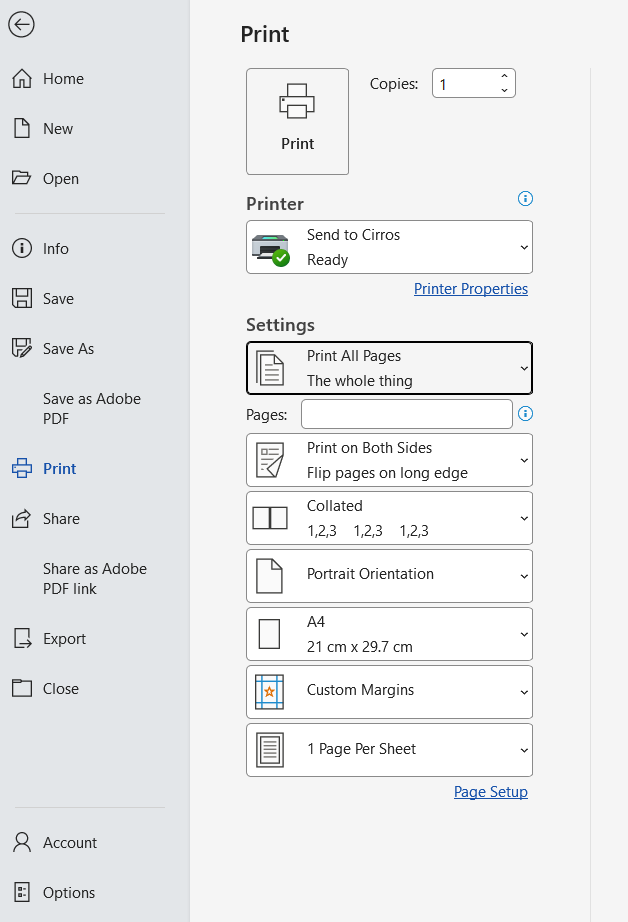
- Open the print dialog. In any application, select Print (usually File › Print).
- Choose Send to Cirros. Select Send to Cirros as the printer. In GovPrint organisations it is called Send to GovPrint.
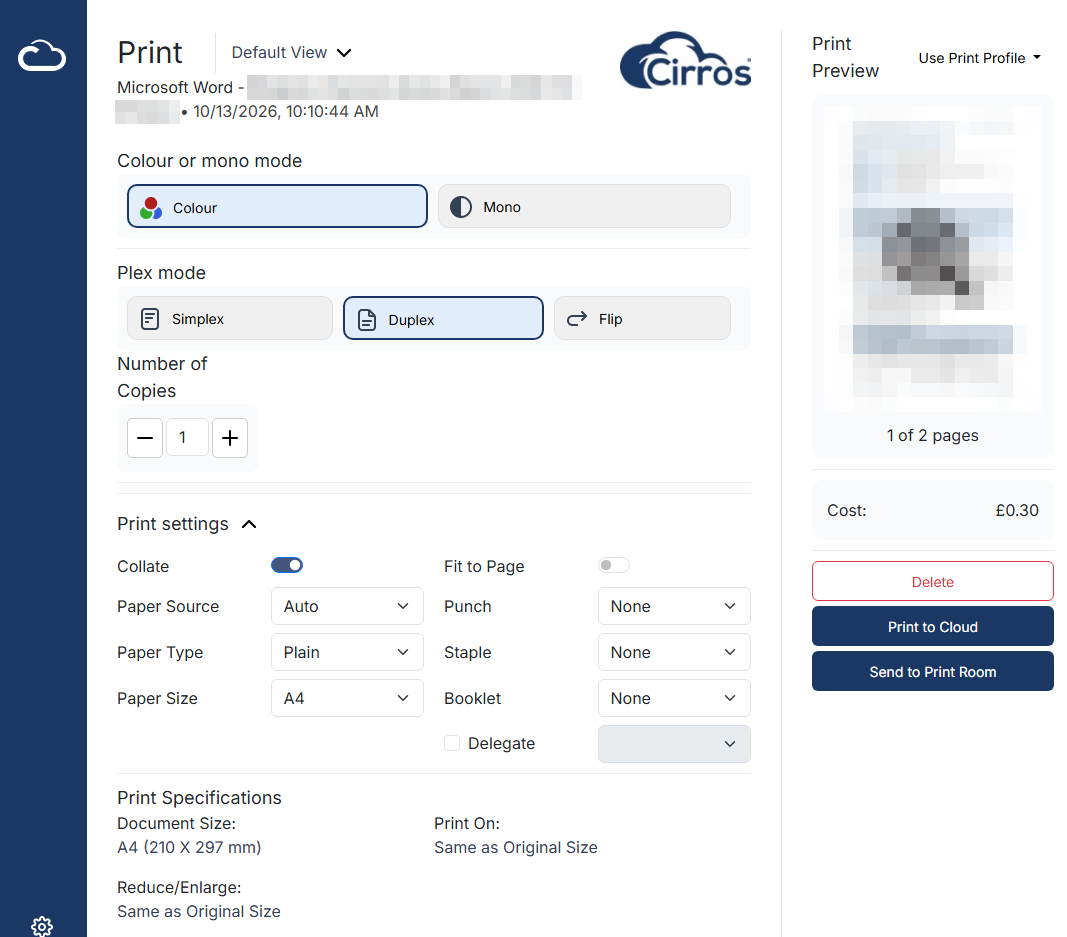
- Choose your print settings. What you do next depends on whether Direct Submission is enabled on your computer:
- If Direct Submission is enabled, use the application's print menu to choose the print job specification (colour, plex mode, paper type, number of copies and so on), then click Print.
- If Direct Submission is not enabled, use the application's print menu, or select Print to open the Cirros print ticket. Choose your settings there (colour or mono, plex mode, copies, and paper and finishing under Print settings), check the preview and cost, then select Print to Cloud.
Tip. You can also use the Direct Print option for devices that don't require authentication to release print jobs.
Releasing your print at the printer
- Sign in. Sign in at the printer as described in Signing in.
- Select Print.
- Choose your documents. A list of your print jobs is displayed. Use the checkbox on the right-hand side to select the document or documents you want to print, then select the green print icon.
- Sign out. When you have finished, sign out. See Signing out.
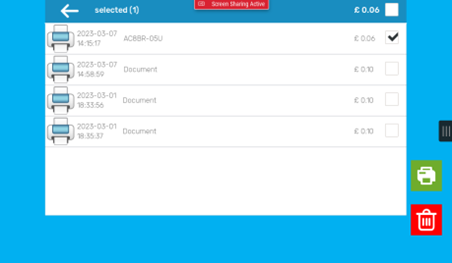
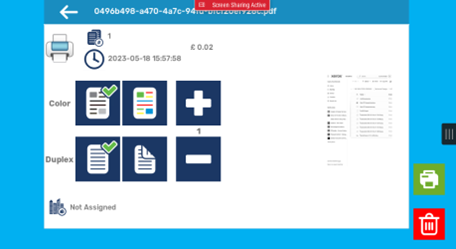
Colour. By default, documents print in mono (black). To print in colour, or to choose other print options, select the document in the list.
Copying
- Sign in. Sign in at the printer as described in Signing in.
- Select Copy.
- Load your original. Place your document or documents in the document feeder or on the flatbed.
- Choose your copy settings. On the copy options screen, choose mono or colour, single-sided or duplex, and the number of copies. Then select the green copy icon.
- Sign out. When you have finished, sign out. See Signing out.
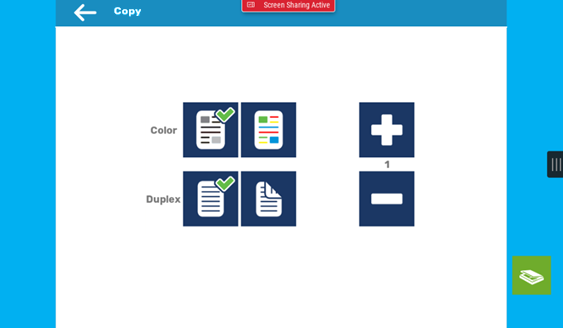
Default settings. The default copy settings are mono (black), single-sided, one copy.
Scanning
- Sign in. Sign in at the printer as described in Signing in.
- Select Scan.
- Load your original. Place your document or documents in the document feeder or on the flatbed.
- Choose your scan settings. On the scan options screen, choose mono or colour, single-sided or duplex, and scan-to-email or scan-to-workstation. Then select the green scan icon.
- Sign out. When you have finished, sign out. See Signing out.
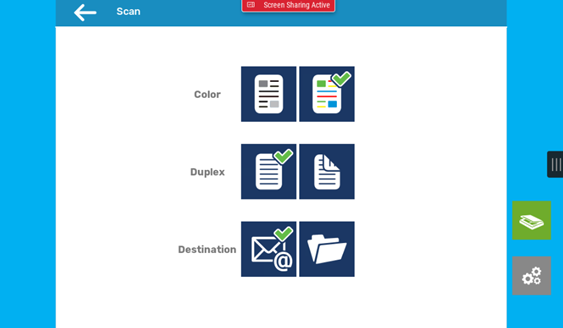
Default settings. The default scan settings are mono (black), single-sided, scan-to-email. Select the grey settings icon to see the advanced options.
Signing out
- Sign out. Return to the home screen and select LogOut.
Always sign out. Sign out when you have finished, so that your account can't be used by anyone else.