
Direct Submission: print without the print window
How to turn on Direct Submission so your documents go straight to the cloud without the Cirros Print window appearing, and how to change or delete a job afterwards.
What Direct Submission does. It suppresses the Cirros Print window, so the default print job properties are applied. You can still change a job's specification afterwards from My Print Jobs.
Enable Direct Submission
- Open the system tray. On the Windows taskbar, select Show hidden icons (the small arrow) to open the system tray overflow window.
- Right-click the Cirros icon. This is the Cirros cloud icon.
- Turn it on. Select Enable Direct Submission.
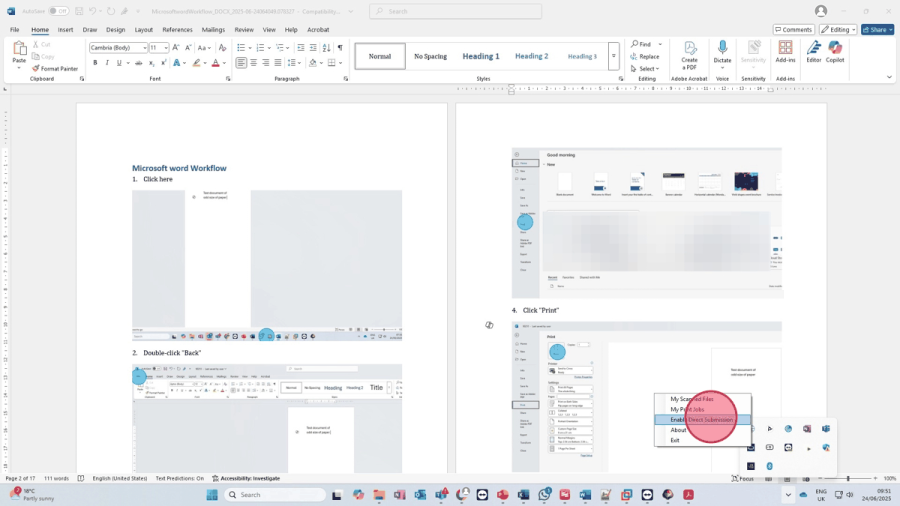
Icon not showing? See The Cirros Notification Client for how to find the Cirros icon or keep it visible in the system tray.
Print with Direct Submission
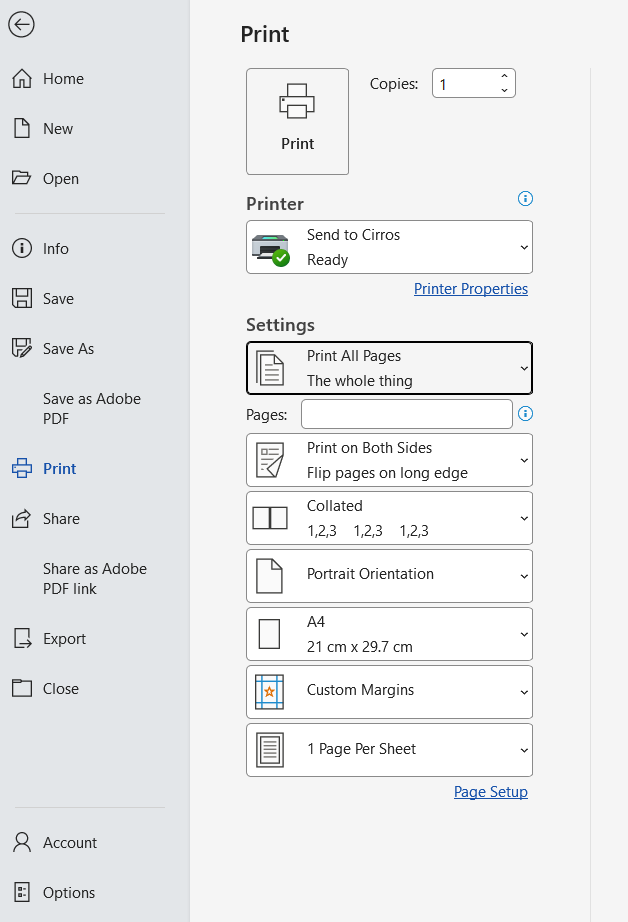
- Open the print menu. In your application, select File › Print.
- Choose Cirros. Select Send to Cirros as the printer. In GovPrint organisations it is called Send to GovPrint.
- Choose your options. Set any options you want in the application's own print menu. For example, to print on both sides, select Two-Sided Printing and then Print on Both Sides.
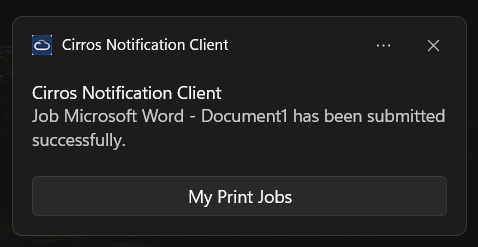
- Print. Select Print. The Cirros Print window does not appear. Your document is sent straight to the cloud and a Windows notification confirms it was submitted successfully.
Change or delete a print job
You can change a job's specification, or delete it, from My Print Jobs.
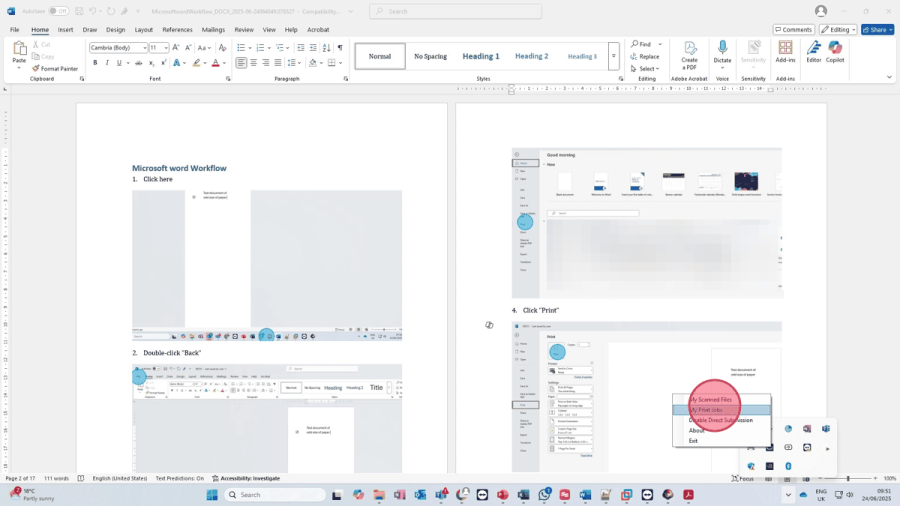
- Open My Print Jobs. Select My Print Jobs in the notification. Or open the system tray overflow window, right-click the Cirros icon and select My Print Jobs.
- Sign in if asked. Enter your email address and select Next. Then enter your passcode and select Log in.
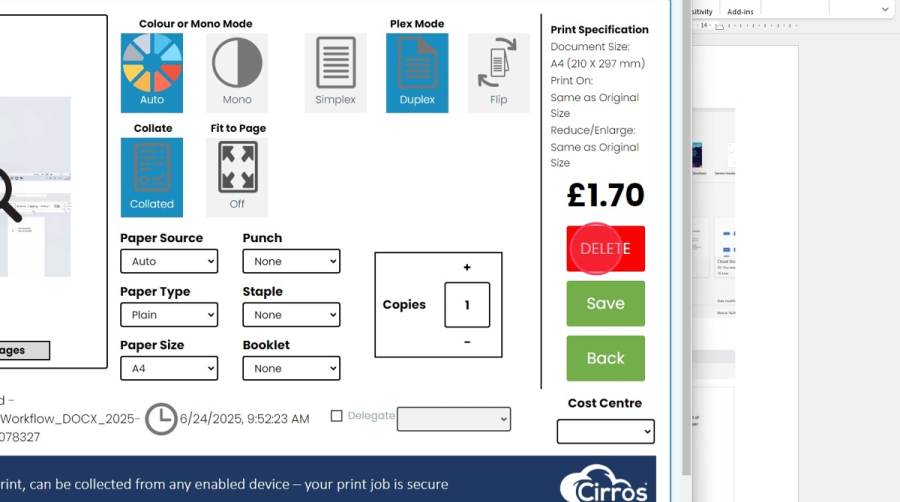
- Select the job. Your print jobs are listed. Select the one you want. The Cirros Print window opens.
- Change it or delete it. To change the job, adjust the options and select Save. To delete it, select DELETE.
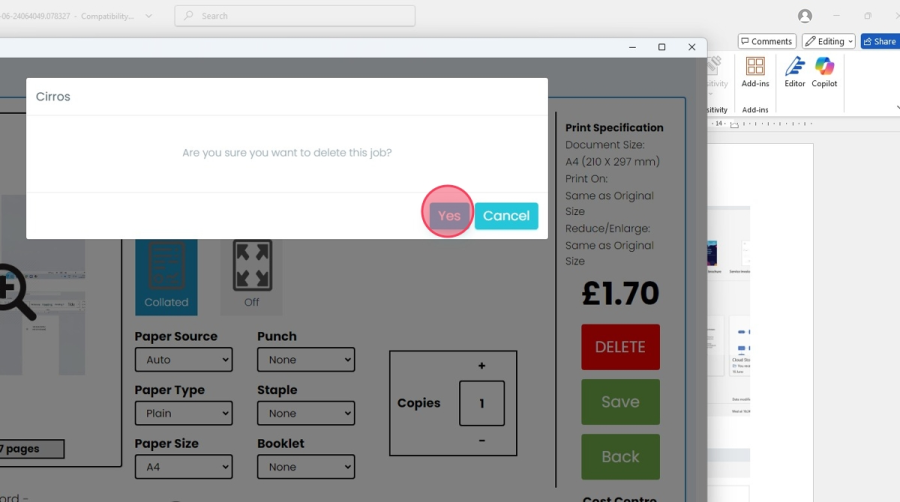
- Confirm a deletion. When asked Are you sure you want to delete this job?, select Yes. Select Cancel to keep the job.
Turn Direct Submission off
Right-click the Cirros icon in the system tray and select Disable Direct Submission. The Cirros Print window then appears again when you print, so you can adjust your options before selecting Print to Cloud or Direct Print.
If a print does not appear. Turn Direct Submission off and print again through the Cirros Print window. Older Windows client builds could occasionally lose the very first print from someone using Direct Submission for the first time. See Cirros Windows client 1.3: known issues.